
IMPORTANT SAFETY NOTICE: BestBushcraftGear.com is not responsible for this information being used improperly. Always be smart when starting fires, be aware of dry conditions, and respect burn bans in your area. NEVER leave a smoldering fire. Pour water on it and stomp it with your foot until the coal bed is a muddy puddle that you know will not flare back up. Don’t be the person responsible for wiping out a forest with your negligent actions!
You’re alone in the woods. The sun is setting and you’re starting to shiver as the cold sets in. If only you knew how to start a fire. If only you had the knowledge to take the materials you see around you to create warmth and safety. If this has ever been your fear, my friend, you’ve come to the right place. I’m going to walk you through several aspects of fire-making, from the materials needed to time-honored methods. Follow this guide, and you’ll be well on your way to becoming a master of the flame.
Firecraft: Understanding the Fundamentals
The art of making fire is one of the most important skills for a bushcrafter. Fire has obvious physical benefits, but there are psychological benefits as well. It acts as a protector and gives the feeling of not being alone in the wilderness.
Understanding the Process
Fire is the rapid oxidation of a material in the exothermic chemical process of combustion, releasing heat, light, and various reaction products.
Fire is made up of three components, known as the fire triangle:
- Oxygen: Necessary for combustion
- Heat: Required to reach ignition temperature
- Fuel: The material that burns
If any one of these components is removed, the fire dies. Understanding this triangle is fundamental to both creating and controlling fire.
Preparing Your Fire Site
Selecting a Spot to Build
When building a fire in the wild, follow these important guidelines:
- Clear the ground of leaf litter and debris to prevent unintended spread
- Gather rocks to make a fire ring to contain the flames (Never use river rocks or rocks found in water, as they can explode when heated due to trapped moisture)
- Stay aware of “widow makers” – dead trees or branches overhead that could fall
- Check for low-hanging branches that could catch fire
- Be mindful of wind direction to avoid filling your shelter with smoke
Fire Materials: What You Need
Wood Selection
You’ll need plenty of wood, preferably hardwood when available. Harder woods burn longer and produce better coals. Good options include:
- Ironwood
- Elm
- Hickory
- Oak
- Maple
- Beech
- Ash
Try to avoid pine if possible, especially for cooking fires. Pine contains resin that creates more smoke, excessive sparks, and creosote buildup which can make food taste unpleasant when cooking over direct flame.
The Three Critical Components of firecraft
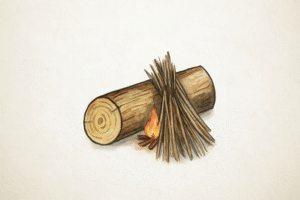
1. Tinder
This is the material that catches fire initially. It MUST be dry. Options include:
- Handmade “bird’s nest” of fine fibers
- Fatwood shavings (resin-rich wood from pine stumps)
- Feather sticks (small piece of wood with thin curls shaved off the side)
- Cotton balls with petroleum jelly
- Jute twine
- Dry grasses
- Cattail fluff
- Dryer lint
- Corn chips (yes, they burn!)
- Birch bark
2. Kindling
These are pencil-sized twigs and branches that catch fire from your tinder and build enough heat to ignite larger fuel.
3. Fuel
Split logs and branches that will sustain your fire over time.
Processing Your Wood
- Always try to use dead standing wood. Wood lying on the ground tends to be damp or wet and will not light easily.
- Avoid felling live trees unless absolutely necessary.
- When gathering firewood, collect at least ten times more than you think you’ll need.
- Use an axe or strong fixed blade knife to split or “baton” wood (a technique where you place your knife on top of the wood and strike the spine with another piece of wood to split it).
Ready to go down the fire making rabbit hole?
Types of Fire Lays for firecraft
Different situations call for different fire structures:
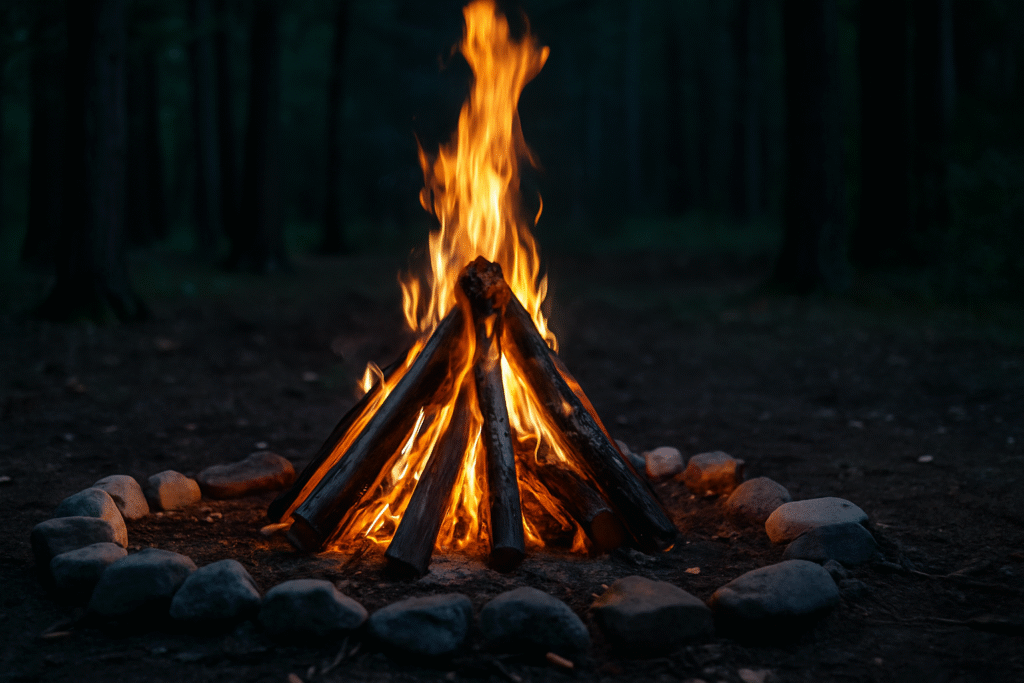
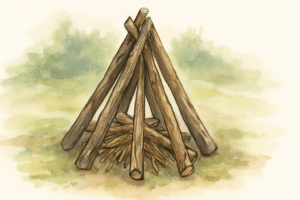
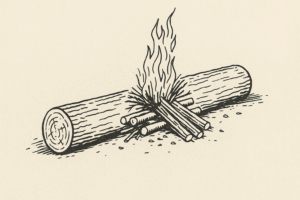
1. Teepee (best for: light, warmth)
- Place kindling in the shape of a teepee
- Put tinder inside and light it
- Excellent for getting a quick flame
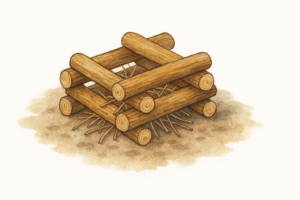
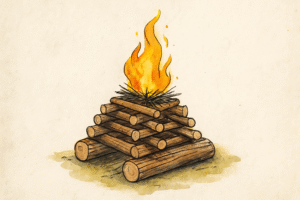
2. Log Cabin (best for: sustained burn, cooking)
- Build with tinder inside
- Allows better airflow
- Creates a stable cooking platform as it burns down
3. Lean-to (best for: cooking, wind protection)
- Similar to teepee with open front
- Good for windy conditions when built against a large log
4. Pyramid or Upside Down (best for: low maintenance, overnight burns)
- Place large fuel on bottom, building a platform
- Cross-lay progressively smaller wood as you go higher
- Put tinder on the top
- Burns from top down, requiring minimal maintenance
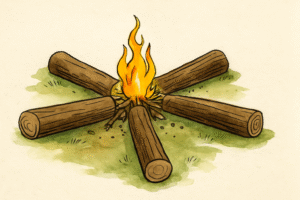
5. Star or Indian (best for: conserving fuel, long burns)
- Lay out logs in a star shape with tips touching in the middle
- Start your fire at the center where logs meet
- Feed logs inward as necessary
- Excellent for conserving wood
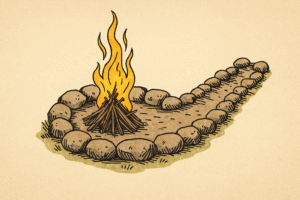
6. Keyhole (best for: cooking with temperature control)
- Build a circular fire
- Dig small trench off one side
- Drag hot coals out to the trench for cooking
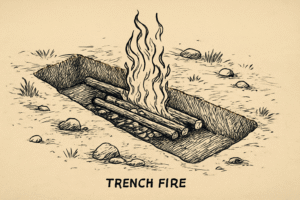
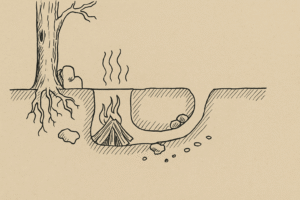
7. Ditch or Trench (best for: windy conditions)
- Dig a trench below ground level
- Protects flame from wind
- Can incorporate airflow channels
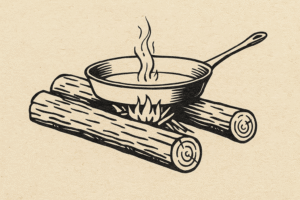
8. Long or Parallel (best for: low maintenance, sleeping)
- Place two large logs beside one another
- Build the fire between them
- Logs will burn slowly inward throughout the night
9. Hunter’s Fire (best for: cooking pot suspension)
- Make a V-shape with two green logs
- Place cooking pot where logs meet
- Green wood resists burning while supporting your pot
10. Dakota Hole (best for: concealment, efficient cooking, windy conditions)
- Dig a hole 8-10 inches around and 12 inches deep
- Dig a tunnel on the windy side about 12 inches away
- Connect the two at the bottom
- Creates excellent airflow while hiding the flame
Maximizing Heat: The Reflector Wall
Building a reflector wall on the opposite side of your fire can significantly increase warmth by bouncing radiant heat back toward you, effectively doubling the heat you feel from your campfire.
To build one:
- Find two sturdy upright logs and drive them into the ground
- Stack logs horizontally between these uprights
- Position the wall behind your fire, opposite from where you’ll be sitting
Fire Starting Methods
A good rule of firecraft is it’s always wise to have multiple ways to make fire. A good rule in survival is: “Two is one, and one is none” – meaning always have backups for critical equipment.
Modern Fire Starting Options for firecraft
Consider carrying:
- Lighters (at least two)
- Ferrocerium rod and striker (or a carbon steel knife to create sparks)
- Storm-proof matches
- Small candle (it’s easier to light a candle and then use it to ignite your tinder)
- Magnifying glass or Fresnel lens (for sunny days)
Traditional Methods
- Flint and Steel Kit with Char Cloth: Charred cotton pieces readily catch sparks from striking high-carbon steel against flint
- Bow Drill: Creates friction to generate an ember using a bow, spindle, hearth board, and bearing block
- Hand Drill: Similar to bow drill but uses your hands to apply pressure and create friction
Friction methods like the bow drill and hand drill take considerable practice to master but are invaluable skills that connect us to how our ancestors created fire.
Troubleshooting Common Fire Problems
- Wet Conditions: Look for tinder in protected areas like under logs or dense evergreen trees
- Smoky Fire: Ensure your wood is dry and increase airflow
- Fire Won’t Catch: Make sure your tinder is truly dry and fine enough to catch a spark
- Wind Issues: Use your body as a windbreak or build your fire in a pit or against a log
Seasonal Considerations
- Spring: Often wet, look for dead branches still attached to trees
- Summer: Beware of dry conditions and fire restrictions
- Fall: Gather dry leaves for tinder, but clear them away from your fire site
- Winter: Dig through snow to find dry material; keep extra tinder in a waterproof container
Conclusion
Mastering firecraft is about preparation, knowledge, and practice. Always remember to completely extinguish your fire before leaving your campsite. With these skills, you’ll never need to fear the approaching darkness or cold when in the wilderness.
I just want to reiterate that using fire in a safe way is your responsibility. I have camped in a burned out area and while nature and time will heal the damage, it’s better if you are not the cause of the damage. for additional information on preventing forest fires see here.
Remember: Be prepared, be responsible, and respect the power of fire.


